When I moved to Maine 17 years ago, my stomach eagerly adapted to lobster rolls, crab cakes and blueberry pie.
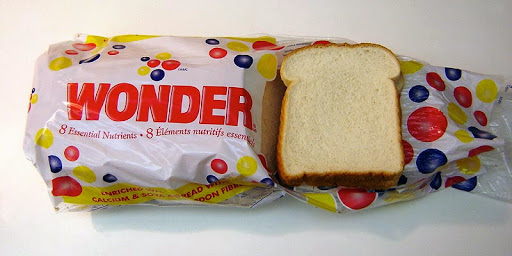
But it developed an instantaneous dislike for American bread. The squishy, soft Wonder Bread from the supermarket made me really wonder what was in there – besides additives, enhancers and preservatives.
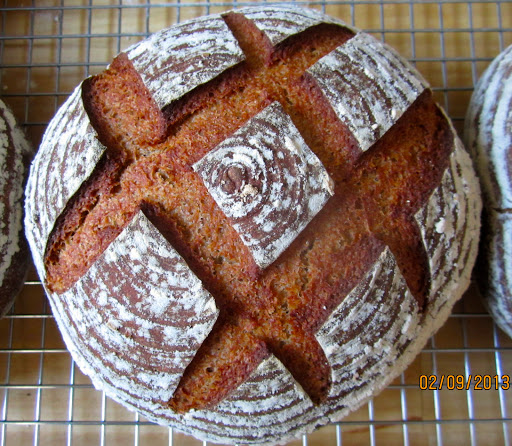
And the so-called “Artisan Bread” wasn’t much better – it had a crust, sure, but it was thick and rubbery.

Soon as I was home, I got to work. To be on the safe side, I had also purchased a package with sourdough extract at the Natural Living Center.
I wanted to bake two identical loaves, one with a homemade starter, the other with sourdough made from the extract. At least one of them had to work!
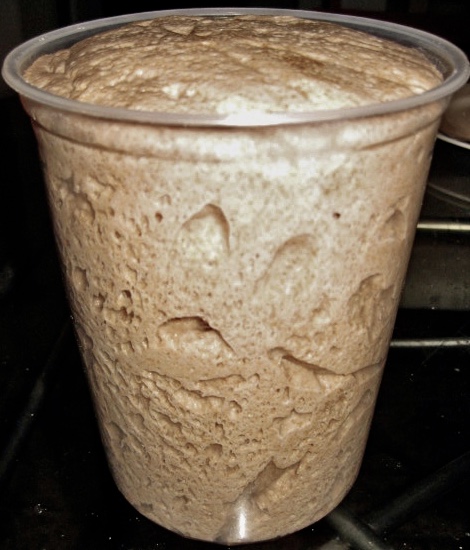
Mixing flour and water in a bowl, I hoped that wild yeasts and lactic acid bacteria, from flour and air, would accept my friendly dinner invitation, and show their gratitude by rapid growth.
Lactobacillus, Saccharomyces & Co. returned my favor, and my first starter was born. And thus began my career as bread baker.
Of course my first trials led to rather modest results. If you are completely clueless about bread baking, a working sourdough alone doesn’t do the trick. You also have to know how to handle the dough, shape and bake it.
Though dense and hard like bricks, we bravely chewed through my first loaves (we still have all our teeth!) At least the taste was a definite improvement over Wonder Bread.
During this stage, from-the-scratch and ready-made sourdoughs still ran head-to-head, but the more often I refreshed both starters, the more the “wildling” inched past the tame one. After three months it surpassed the store-bought starter by far in aroma and activity.

The formula is very uncomplicated, just water and flour, and it worked every time, whenI accidentally used all my saved starter, and there was nothing left to feed a new one.
What kinds of flour are best for a seed starter? Flours that contain a lot of starch as food for sourdough cultures: wheat, rye or spelt. Wheat and spelt sourdoughs are rather mild, compared with a more assertive rye sourdough. But once you have an active starter, you can change it just by feeding it with another kind of flour.
Some baking book authors swear by adding acidic fruit juice, chopped onions or other (more or less exotic) ingredients to prevent undesirable (leuconostic) bacteria from interfering with the wild yeasts. I never experienced this problem, my yeasts always grew well.
And what if an alien invasion should really take over, before the sourdough bacteria can acidify the starter sufficiently? If it ominously changes its color, or even grows a moldy “fur”? Has a yucky odor instead of emitting a mild vinegary smell? Then you throw it away, and start all over again – for a few cent!
But be aware that, during the fermentation process, a somewhat unpleasant smell (like throw-up) might temporarily develop. No worries, this will vanish when yeasts and bacteria get comfortable with each other, and be replaced by a pleasant, fruity-acidic aroma.

WILD YEAST SOURDOUGH STARTER (adapted from Susan Loomis: “French Farmhouse Cooking”
(Ready to use in 4 – 5 days)
Ingredients:
2 cups flour (wheat, rye, or spelt flour), divided
1 cup lukewarm water, divided (no warmer than 104ºF/40ºC – otherwise you’ll kill the yeasties!), more as needed, to achieve the right consistency.
DAY 1
In a medium-sized bowl, mix 1 cup of the flour and 1/2 cup of the water. The mixture should be like thick pancake batter. (Whole grain flours absorb more water, add a little more, as needed.)
Cover the bowl with a clean kitchen towel, and leave it in a warm place. (In this nurturing environment the wild yeasts and sourdough building bacteria will start to grow. Most of them are clinging to the flour, but some are floating in the air.)
DAY 2
No action is required, just let the microorganisms do their job.
DAY 3
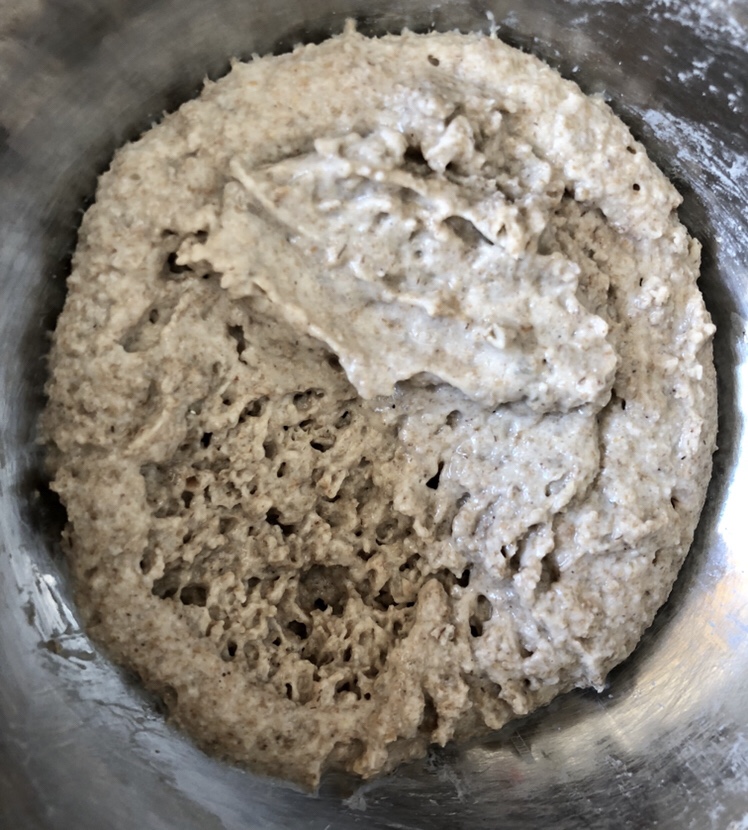
Check your starter. It should be lively, puffed up, with little bubbles, have a slightly sour smell and possibly a darker surface: this means the yeasts and bacteria are doing just fine.
Add the 2. cup of the flour and another 1/2 cup of water (or a bit more, if you use whole grain flour) to the starter, and mix well. Cover the bowl again with the kitchen towel, and put it back in its warm place for another 24 – 48 hours.
DAY 4 – 5
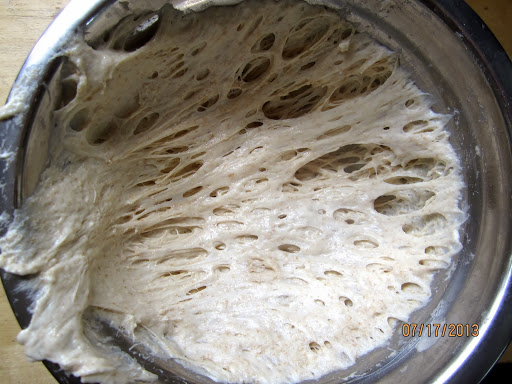
Your seed starter is ready when it emits a nice sour smell, forms little bubbles and its surface has turned slightly dark.
Transfer starter to a container with lid (big enough that it can rise again, after deflating somewhat from the transport,) and place it in the refrigerator. (I keep my starters in empty yogurt or sour cream containers)
Your starter is now ready to be used: the mother starter for all your future sourdough breads! But don’t expect top performance from your newborn sourdough – it ages slowly and needs several cycles of refreshing, before giving the bread its typical tang.
WARNING: Never use all of your mother starter, always keep a small amount, enough to refresh it, and make a new sourdough starter!
SOURDOUGH MAINTENANCE
Keeping an “all-round-starter” is the easiest option: one that requires low maintenance and can be used as a base for every kind of sourdough you want. For this purpose, a whole wheat or rye starter works better than a white starter, and a less liquid sourdough keeps better than a high hydration one.
My standard mother starter is a whole wheat sourdough with a flour/water ratio of 100 : 75. This 75% starter is medium acidic, and keeps at least 2 weeks in the fridge without feeding.
This is the formula (in baker’s math the amount of flour always equals 100%):
100% whole wheat flour + 33% mother starter + 75% water
Feeding a whole wheat starter (75%)
60 g whole wheat mother starter (75%)
180 g whole wheat flour
135 g lukewarm water
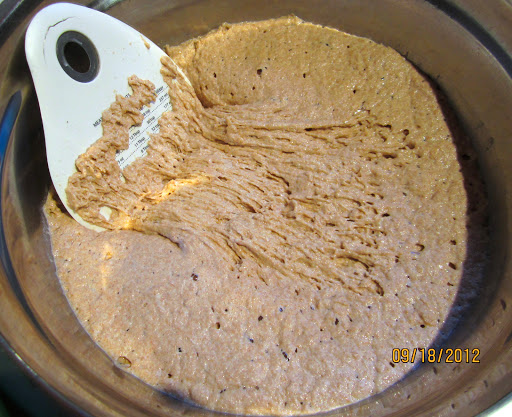
In medium bowl, whisk mother starter and water, until sourdough is dissolved. Add flour, and mix (by hand, Danish dough whisk, or wooden spoon) until all flour is hydrated, and no flour traces remain.
Cover, and leave for several hours or overnight, until starter has visibly grown (the time depends on prevailing temperature and freshness of flour). Transfer starter to a container with lid, and place in the refrigerator.
Conversion to a rye sourdough:
Feed with rye flour instead of whole wheat. A rye sourdough will not rise much, but look slightly puffed, with a few holes on the surface.
Conversion to a white sourdough:
Feed with bread or all-purpose flour, but add only 113 g water (white flour absorbs less water than whole grain flour!). Formula: 100% white flour + 33% mother starter + 63% water.
Many bakers like keeping their starters at room temperature. Since sourdough cultures multiply much faster in a warm environment, such a counter top starter is high maintenance and needs daily feeding.
But what to do with the all that surplus? People who don’t bake every day, going through a lot of sourdough, will have to trash it before their kitchen turns into a Little Shop of Horrors (“Feed Me!”)
I don’t like throwing out something perfectly good and usable. Therefore I keep my mother starter in the fridge.

SOURDOUGH SURVIVAL GUIDE
You are dreaming of sun, beach and a Margarita, but don’t want your precious sourdough starve to death at home:
Stuff it: you should always feed your starter the day before your trip. A regular feeding (see above) is okay for a 2-week leave. If you plan a longer trip: double the amount of flour and water
Dry it: smear sourdough in a thin layer over a large cutting board. Leave it for several days (at room temperature) to dry completely. Scrape dried starter flakes into a jar with lid. Dried starter keeps basically forever in the fridge.
To revive it, simply mix dried starter with an equal amount of water (by weight.) After 2 hours soaking, feed it with flour and water as usual.
Freeze it: possible, but it will take much longer to wake and activate your starter, since many yeast cells will die from hypothermia.

DEAD OR ALIVE?
You won a several week long cruise, but were so excited that you forgot to feed your starter before boarding the Queen Mary? Or you discover one day that your starter lies prone in its home, and looks more dead than alive?
How do you know whether your starter has really bit the dust, or can be resuscitated?
Even, if the starter looks dark and shriveled, with a puddle on top, and smells like a ripe cheese: always look for signs of life before you trash it! Remove the dark top layer with a spoon: if you find lighter colored dough with spongy structure beneath, there is still hope!
Salvage some of the healthy part, feed it with flour and water, and the seemingly deceased will come to life again.
RED FLAG:
Hands off, if your starter has grown a “fur”. A moldy sourdough is a goner. R.I.P.!
BACK-UP:
Even if you don’t win a trip to Cancun: it’s always good to have dried starter as back-up (see above) in the fridge!
BUT WAIT – THERE’S MORE!
Since first writing this post, I found some very unconventional (and amazingly fast!) ways to create a starter from scratch: for slobs (who don’t clear out their fridge before their jam or apple sauce gets boozy), for health conscious kefir fans, and beer brewers:
Check out my post: FUN WITH SOURDOUGH!

Let’s end this Wild Yeast Starter 101 on a “sour note”, and check out what Stanley Ginsberg, The Rye Baker (and Inside the Jewish Bakery), has to say about sourdough maintenance: “Sour Notes – a Carmudgeon’s Take on Sourdough Starters.”
(Updated and re-written post, originally published October 2009)
Hier geht’s zur deutschen Version dieses Posts


ich sollte mal wieder nach meinem Roggen-Sauerteig schauen… wobei sich der schon öfter als Überlebenskünstler erwiesen hat. Danke für die schöne Übersicht!
LikeLike
Danke, Christine, sie sind zum Glück wirklich zäh, die Yeasties 😊
LikeLike
There is nothing better than homemade bread and yours sound delicious!!!
LikeLiked by 1 person
Thanks, and you are right: once you start baking your own, you never look back!
LikeLike